Cookbook: Starting a new project with NodeNetwork
Starting a new project with NodeNetwork is as easy as creating a new VS project and adding the relevant packages from NuGet.
If you know how to do that, you can skip this section.
Step 1: Creating the project
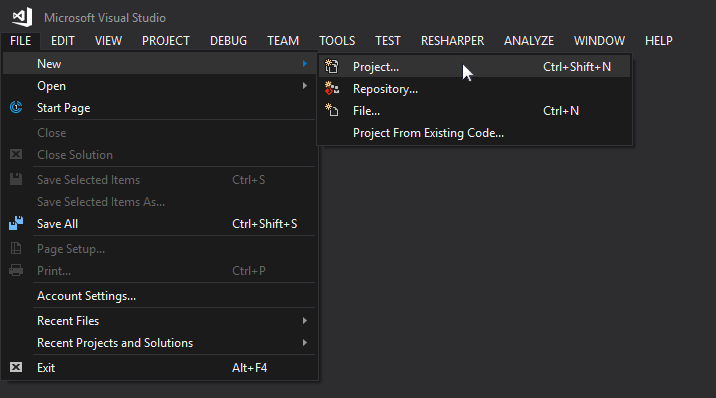
Create a new Visual Studio project by choosing “Project…” under File -> New.
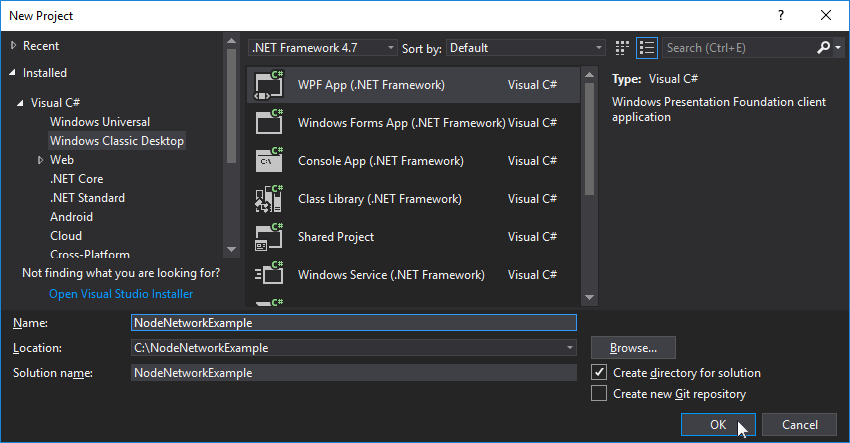
In the “New Project” dialog, choose WPF App and set the .NET Framework version to 4.7 or higher.
Choose any name and location you like and press OK.
Step 2: Installing the NodeNetwork packages
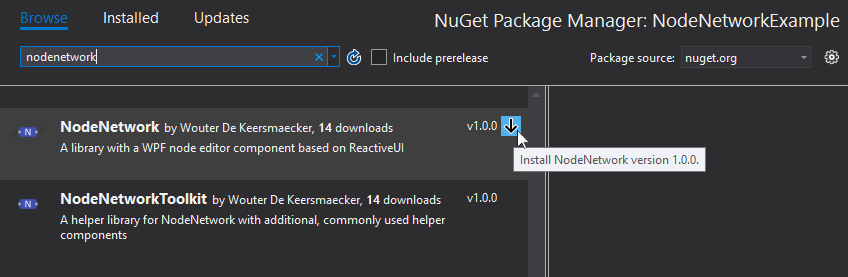
Right click your new project and choose “Manage NuGet Packages…”

Under “Browse”, search for “NodeNetwork” and install the correct package. The webpage for the correct package can be found here. A second package “NodeNetworkToolbox” is also available and provides components for common use-cases.
You are now ready to use NodeNetwork in your new application.